.png)
In order for a user to view an asset on the portal, they must first be granted the permission to view that asset.
This can be done in a number of ways: Users can be assigned permission to see an asset as part of a specified category, or they can be granted permission to see an individual asset.
NB. Previously, users were required to use the ‘mapped groups’ tab to assign groups to a user, which in turn allowed the user to view an asset. This has now been replaced by the below method, however it is still possible to assign Asset Visibility Permissions based on groups via this method.
How to Grant or Modify a User’s Asset Visibility
Depending on your user permissions you might not have access to the Asset Permissions tab.
From the Manage Users page (Admin > Manage Users) click the required user from the sidebar. Then click on the ‘Asset Permissions’ tab.
Below are examples of the rules you can configure for a user's Asset Visibility, there are corresponding guides below for each example.
-
Grant a user access to a whole company’s assets
-
The user can see all assets within Axscend
-
-
Grant a user access to specific assets within a company.
-
The user can only see 10 selected Assets within Axscend.
-
-
Grant a user access to a group, type or site within a company.
-
The user can see all assets within Axscend’s ‘Runcorn’ group.
-
The user can see all assets within Axscend which are Trailers.
-
The user can see all assets within Axscend which belong to the site ‘Axs Depot’
-
-
Grant a user access to a combination of a group, type or site, within another group, type or site.
-
The user can see the assets within Axscend’s ‘Runcorn' group, where the assets are of type ‘Trailer’.
-
The user can see assets within Axscend which are of the type Car, where the assets belong to the Site ‘Axs Depot’
-
The user can see the assets within Axscend which belong to the site ‘Axs Depot’ and the group ‘Staff’.
-
Granting a user access to a combination of specific groups, asset types and sites
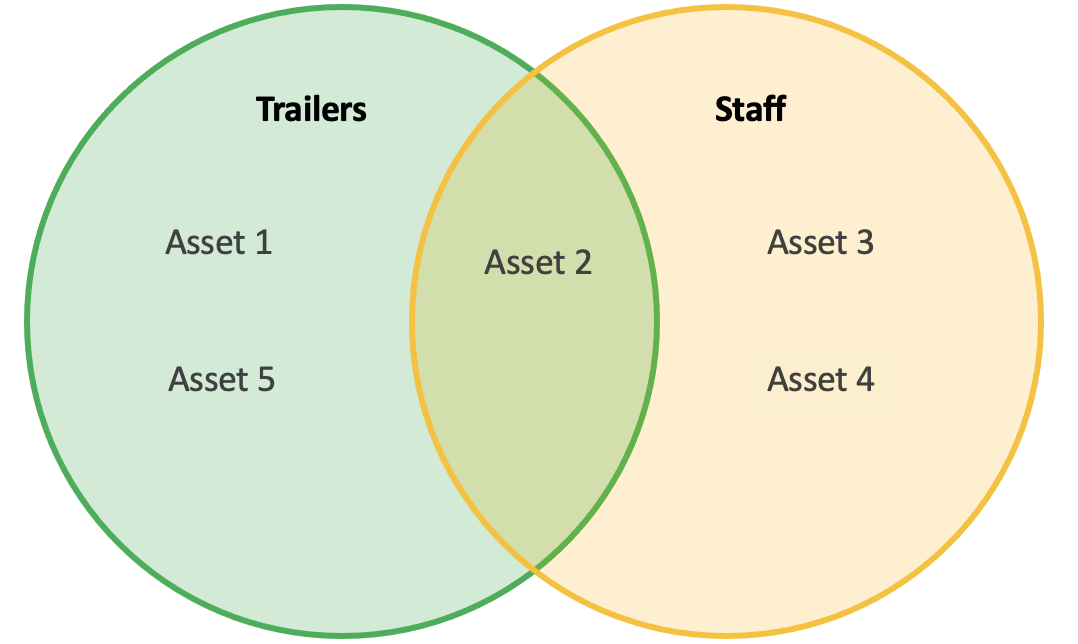
You can also set up more complex rules for a user's asset visibility using the logical AND.
For example, you can configure a rule so a user can only see assets which belong to the group Staff AND are of the type Trailers.
To grant this rule on the portal, click the company without checking the box. This will populate the 2nd column with categories.
In the 2nd column, you can click either Group, Type or Site. In this example, we are going to select Asset Type to build the first half of the rule.
The 3rd column will now list the items from the category selected in the 2nd column, in this example showing all the types.
In the 3rd column click the relevant Group, Type or Site without checking the box. In this example, we want to choose the type Trailer.
This will populate the 4th column with available subcategories.
In the 4th column, you can select a subcategory - not including the category you selected previously. In this example, we are going to select a Group to build the second half of the rule.
In the 5th column click the box alongside the relevant Group, Type or Site. In this example, we want to choose the group Staff.
The summary on the right will update the user's visibility. This shows the user can see all assets within Axscend which belong to the group ‘Staff’.
The '-' symbol in a checkbox means it is neither unchecked nor checked.
In the above example, some Trailers will be visible based on a lower level rule (Group).
Thus, some assets from Axscend will be visible.
Adding A Second Rule
You can optionally add more rules.
Choosing another company from the 1st column will start a new rule for a different company.
Or, clicking in the 2nd column will start a new rule for the current company.
This rule will be independent of the one you have just created.
After adjusting the rules, you should check the summary of the Asset Visibility rules in the right sidebar.
You can view a breakdown of which assets will become visible to the user.
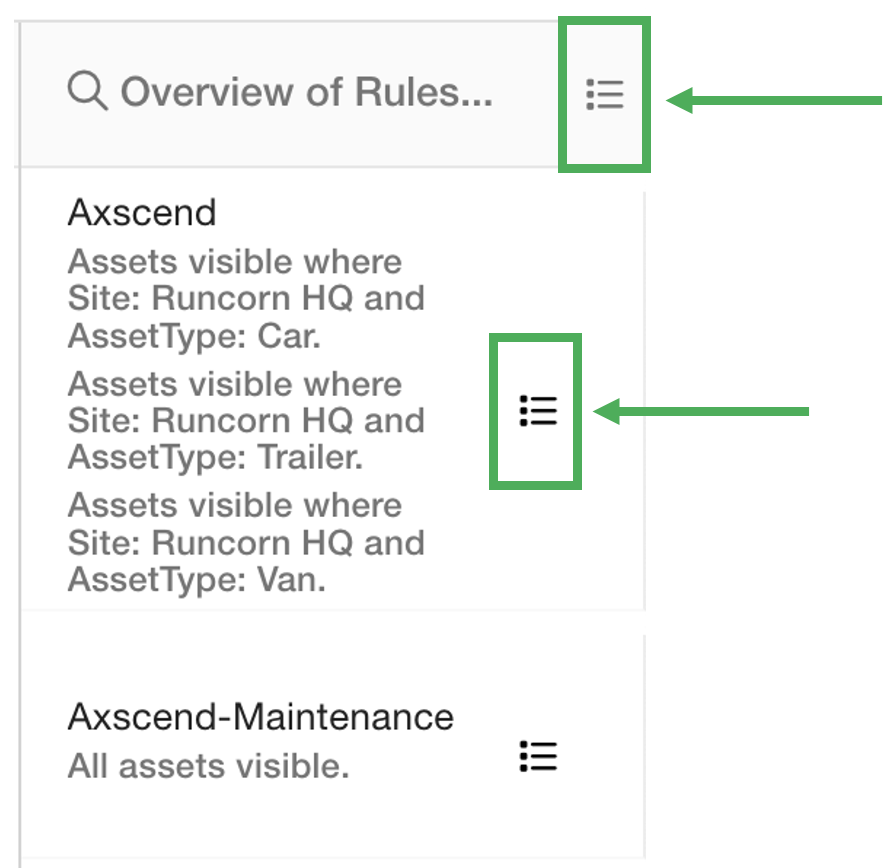
Click the Menu button alongside the title to show a complete list of all the assets that will be visible to the user across all companies and rules.
Or click the Menu button alongside each company’s rules to see which company assets will be visible to the user.
If the user requires visibility of another company’s assets, repeat the steps for the next company.
Click the save icon to finalise the Asset Visibility Permissions for this user.