.png)
Go to the Reports page to see how to get here.
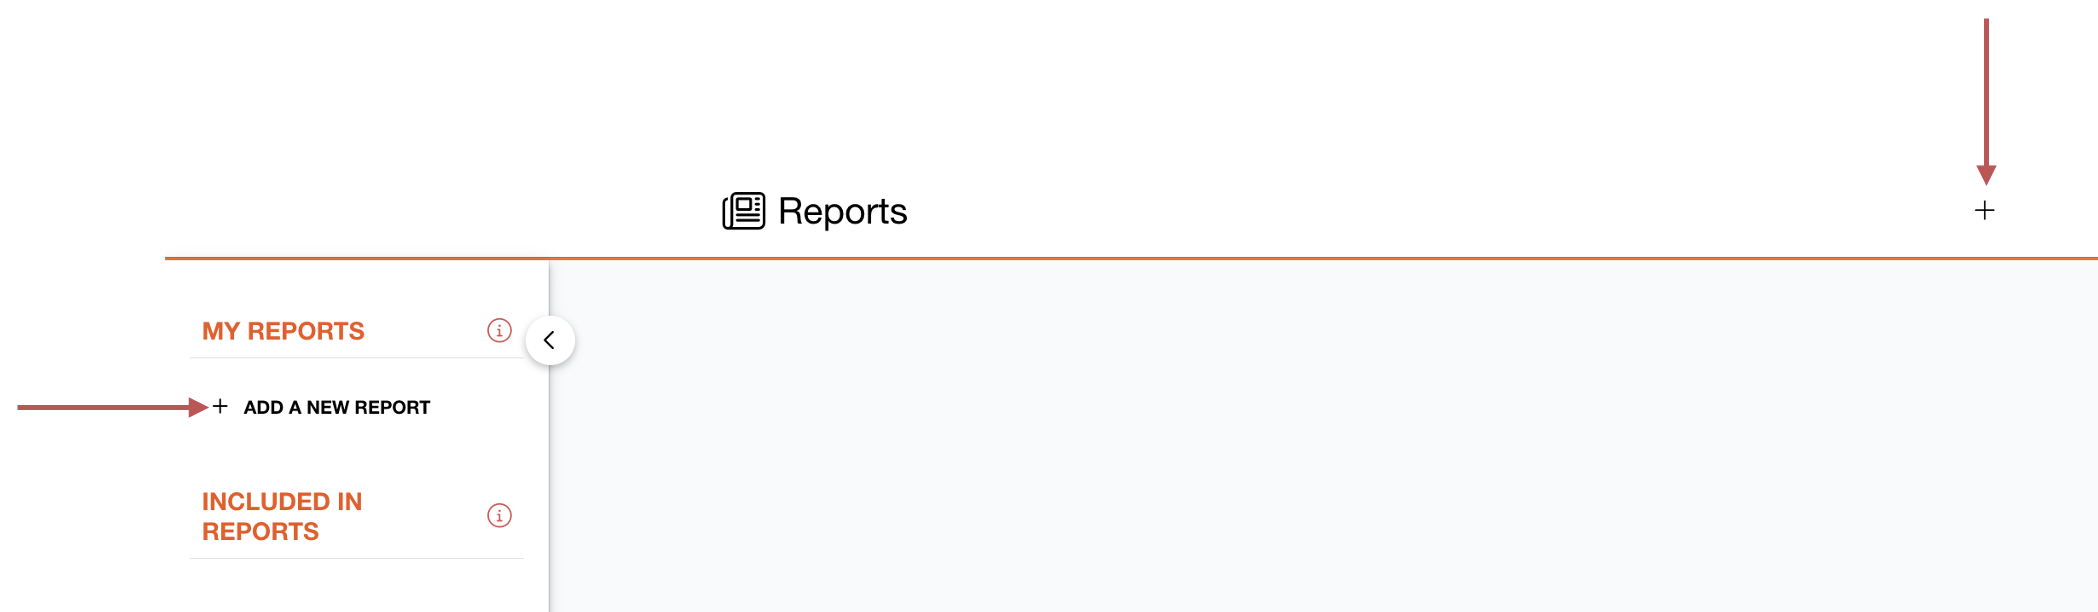
You’re on the Report page.
-
Click either Add or Add A New Report.
-
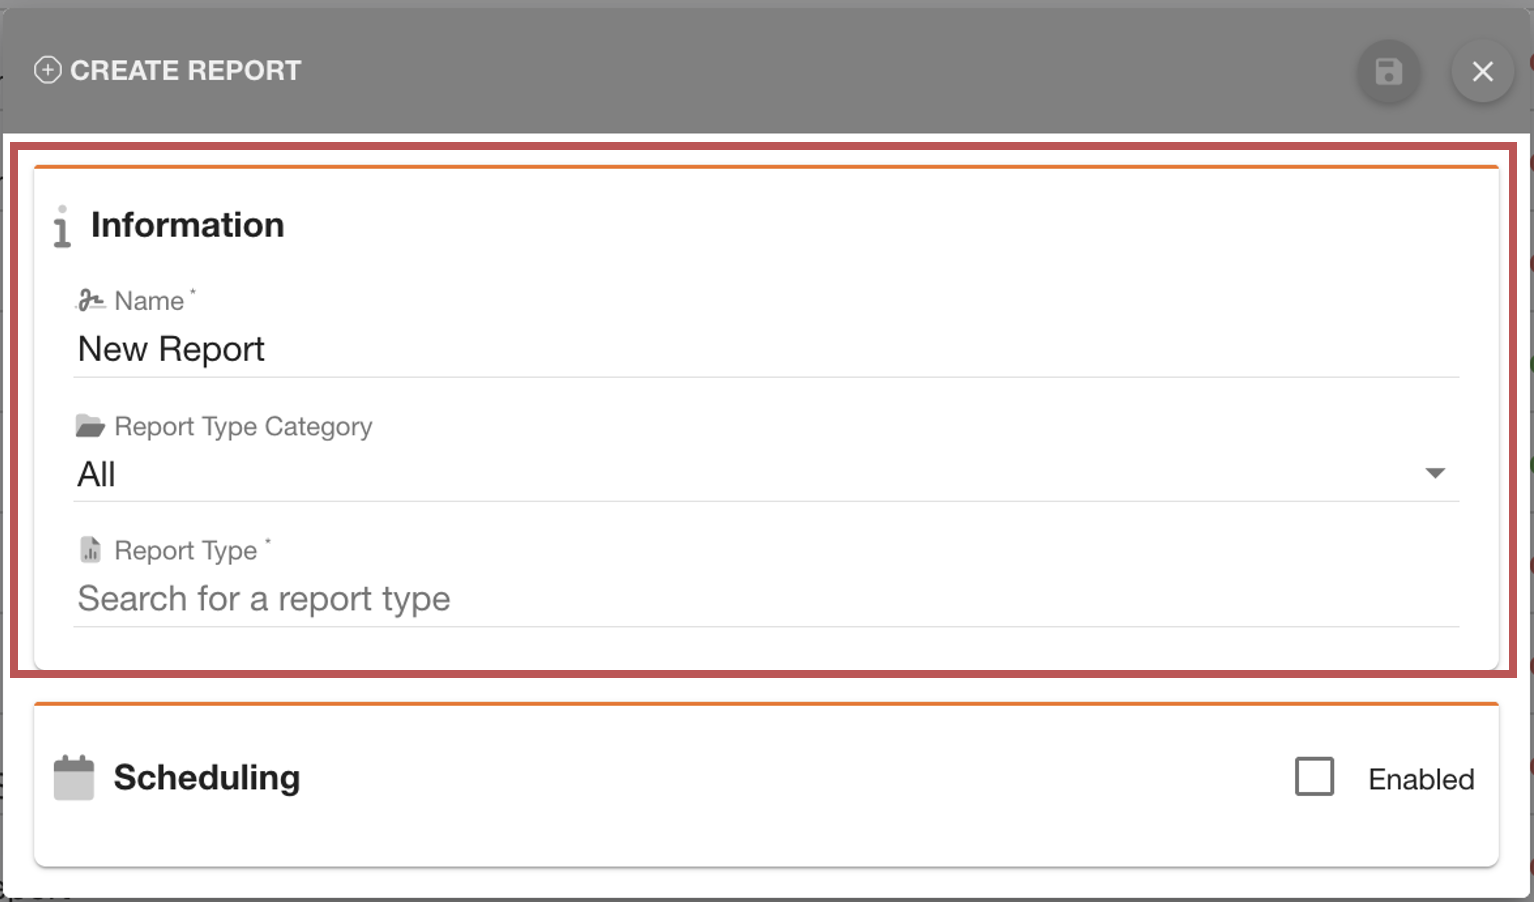
A pop-up window will open.
-
Information
-
Fill out all relevant fields in the Information Section.
-
Name the report.
-
Select a Report Type Category.
-
Select a Report Type.
-
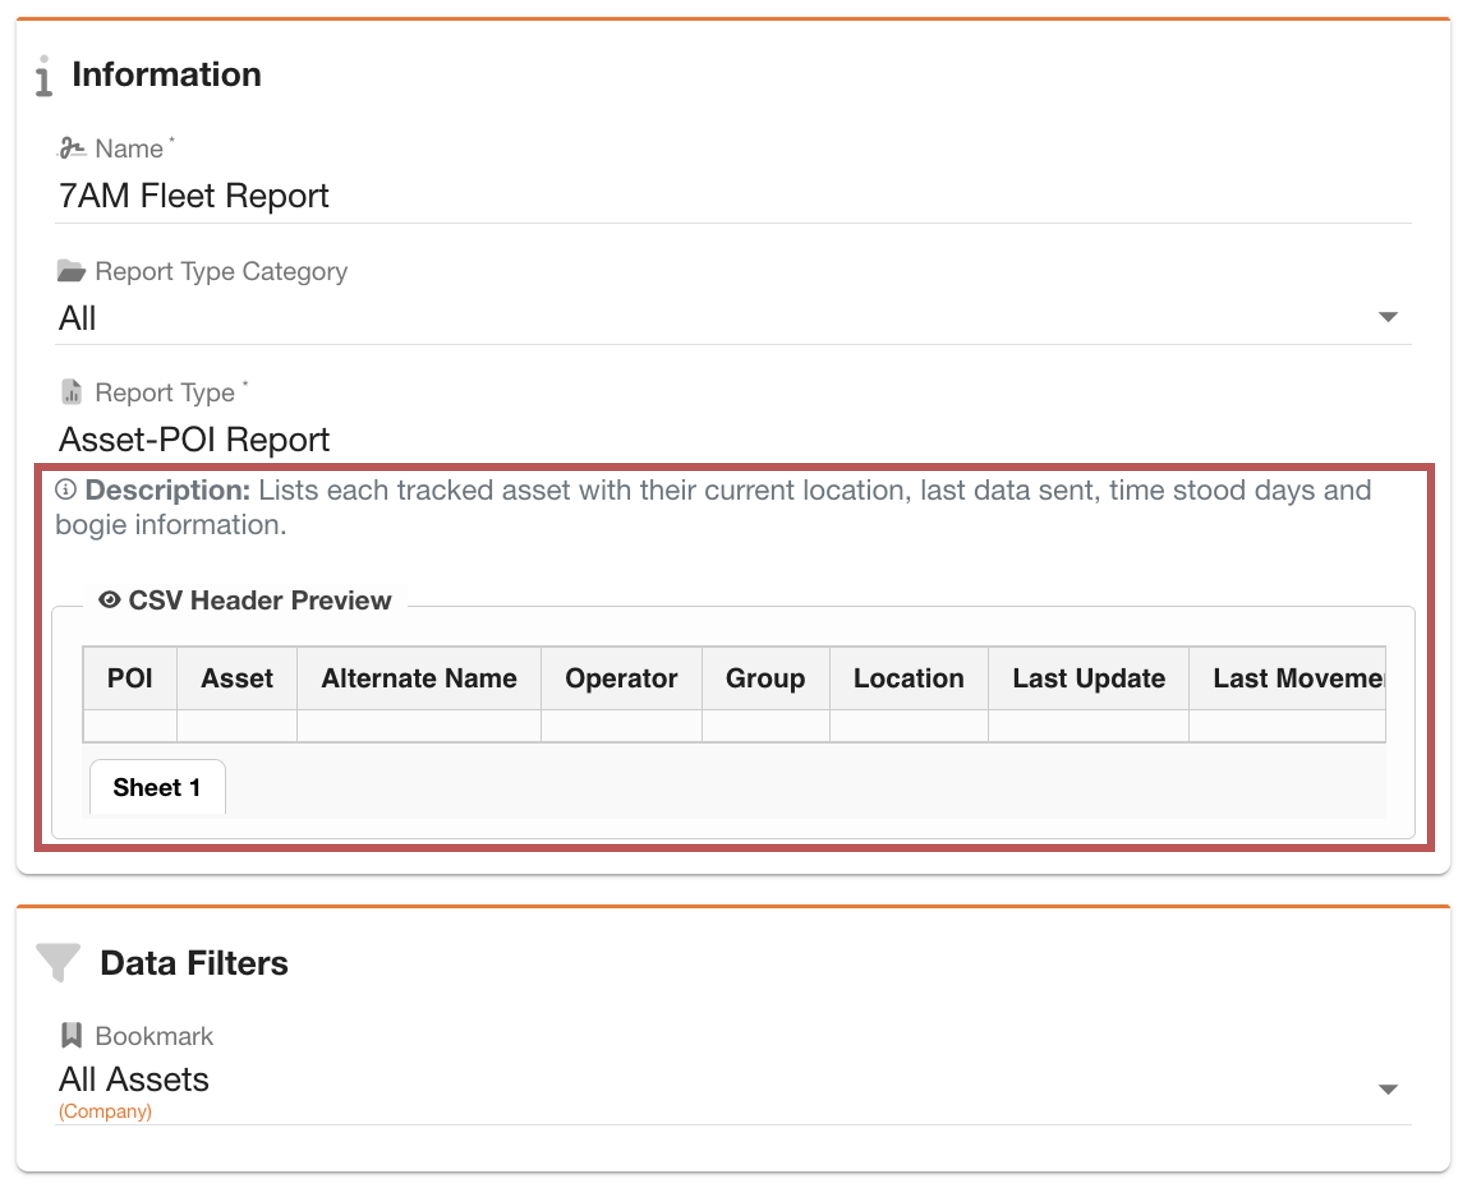
Preview
When a Report Type is selected, the description of the report will show below. Additionally, if the report type has a CSV option you will see a preview of the CSV headers.
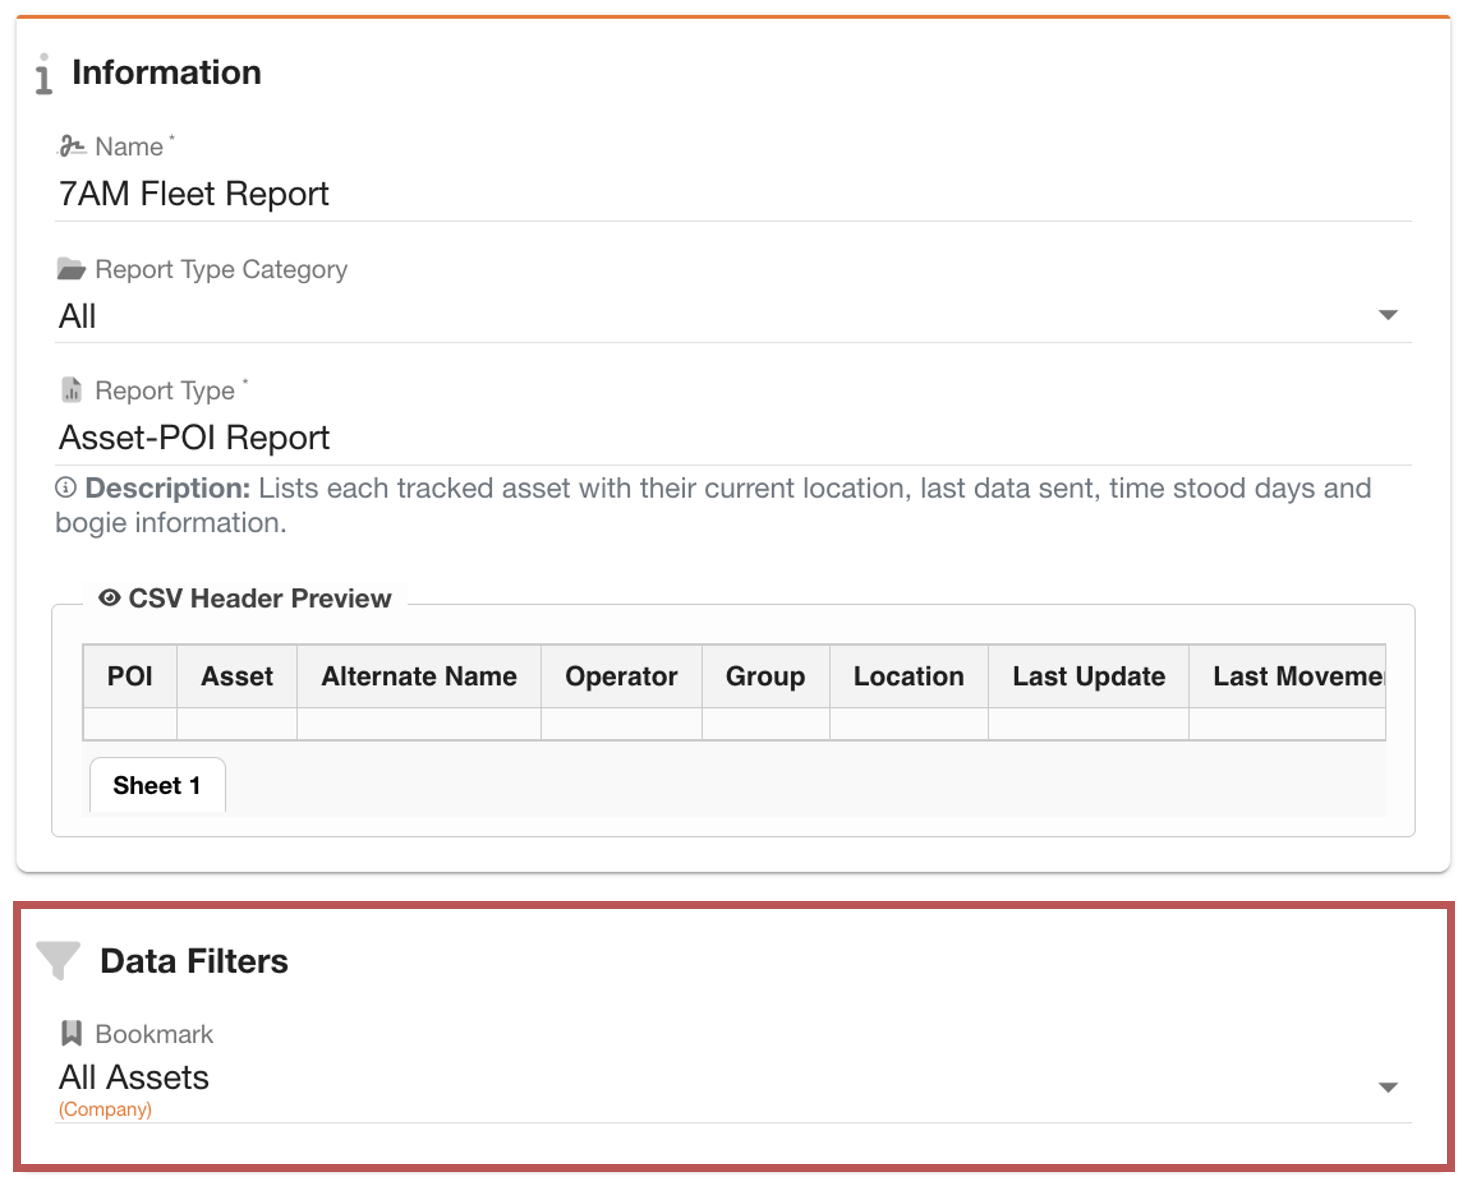
Data Filters
On Report Types looking at large data sets, you may be given the option, or in some cases required, to filter the data down by Bookmark, Time Period, or Date Range.
-
Fill out the relevant provided filters.
This report is not currently scheduled. Scheduling a report delivers it automatically, eliminating the need to revisit the Reports page to download it. See the Scheduling Report section below.
Otherwise, skip to Saving Report.
Optional: Schedule Report
-
Click Enabled in the Schedule Section
Now, you should continue to fill out the required schedule details.
a) Time and Frequency - to choose when you will receive your report.
b) Delivery Type - select either an attachment or a download link.
Attachments may fail for large reports (over approximately 35MB).
For large or detailed reports, we recommend selecting Download Link instead of Attachment.
c) Report Content
This option determines what data each person will see.
If you select a single shared version, all recipients receive the same report based on your access and assets.
If you select individual user-specific reports, each recipient receives a version filtered to their own permissions and assets.
Recipients (external users) will receive the same report as the report owner.
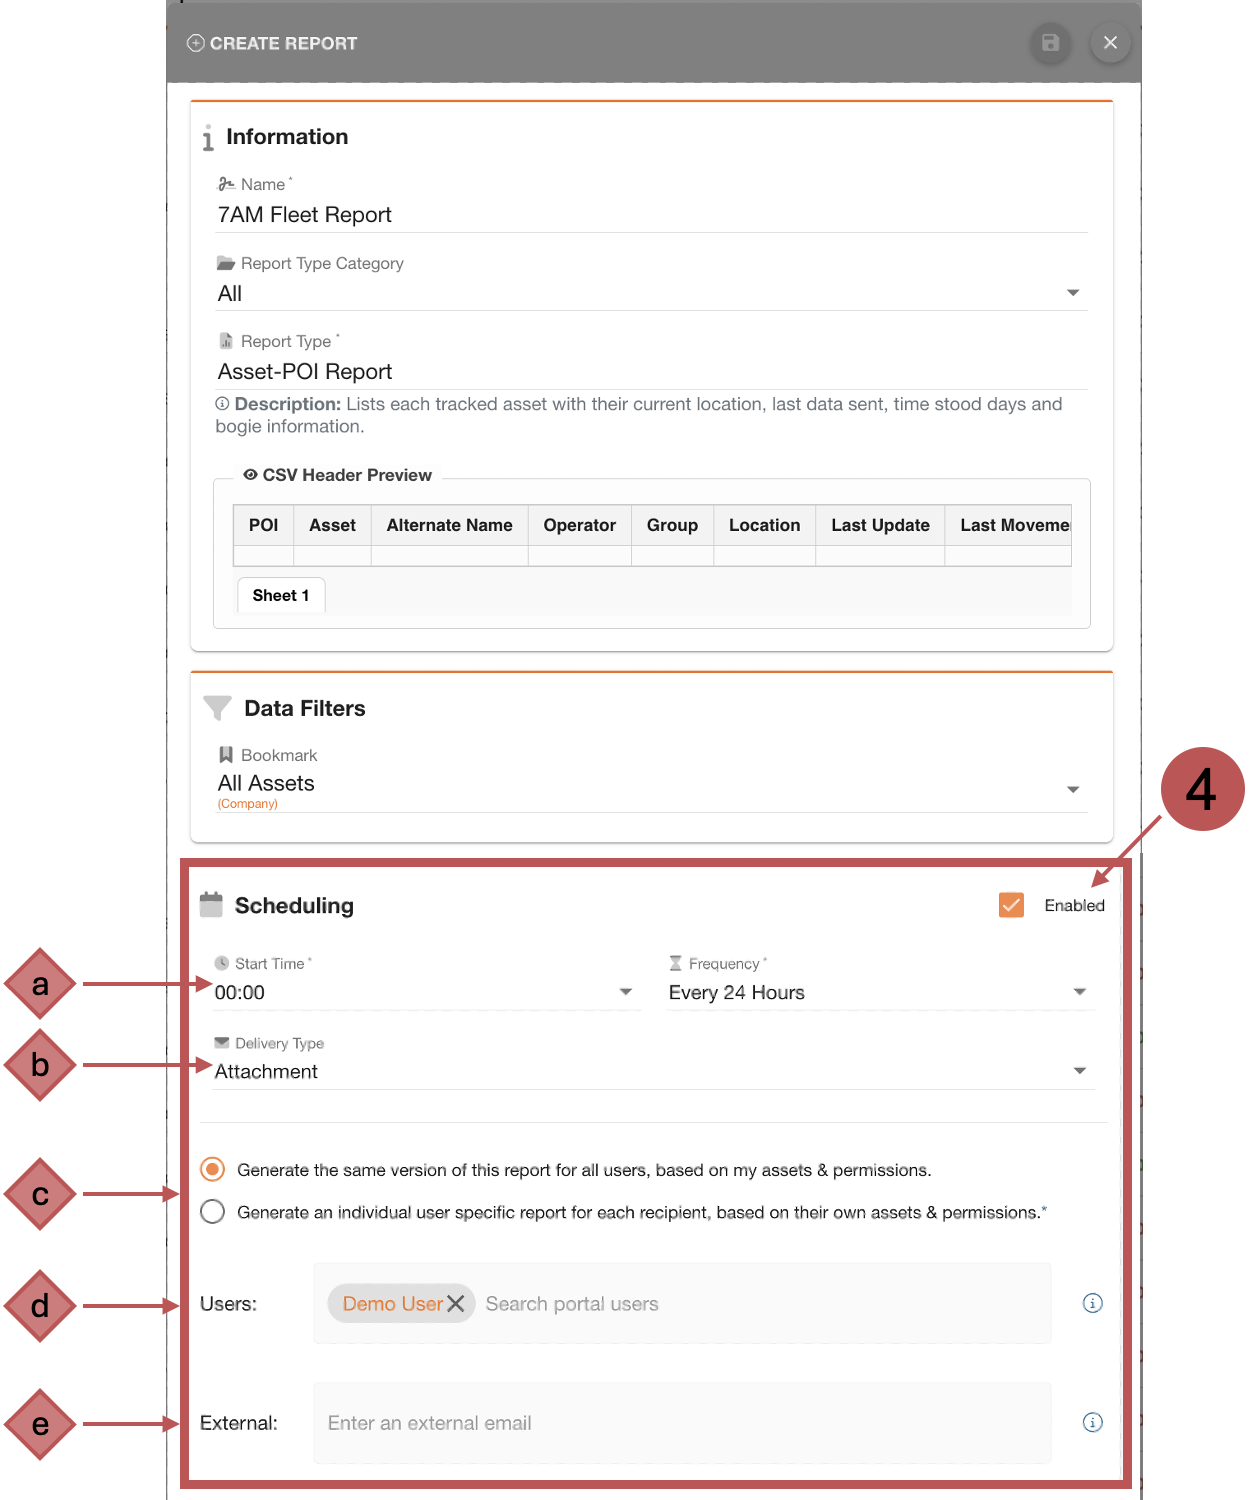
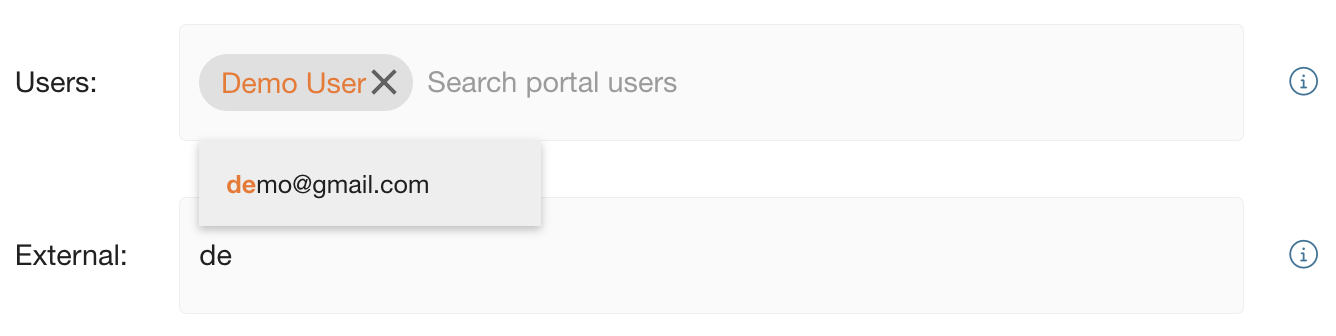
d) Users - Axscend Users who will also receive this report.
Start typing a user’s name and select one of the suggestions.
e) Recipients - External Users will be CC-ed on the owner's copy of the report.
Start typing the user's email address and click Enter to add.
You may see suggestions of previous recipients; click a suggestion to add as a recipient.
If you remove yourself as a User of your own report, any added recipients will also stop receiving the report.
Saving Report
-
Click Save.
The report has been created and will appear on your Reports page.