.png)
Editing Finance Records
Go to the Finance Records page to see how to get here.
Once a PO Number has been supplied, many of the finance record fields can no longer be edited.
You’re on the Manage Finance page.
You’re in the Finance Records tab.
The finance record has already been created.
-
Select the finance record you want to edit.
-
The editor will open.
-
-
Make your edits.
-
Click the Save button in the editor.
The finance record has been edited.
Required Fields
The Save button will become active once all required fields have been filled out. Required fields are marked with a * and will turn red when not filled out.
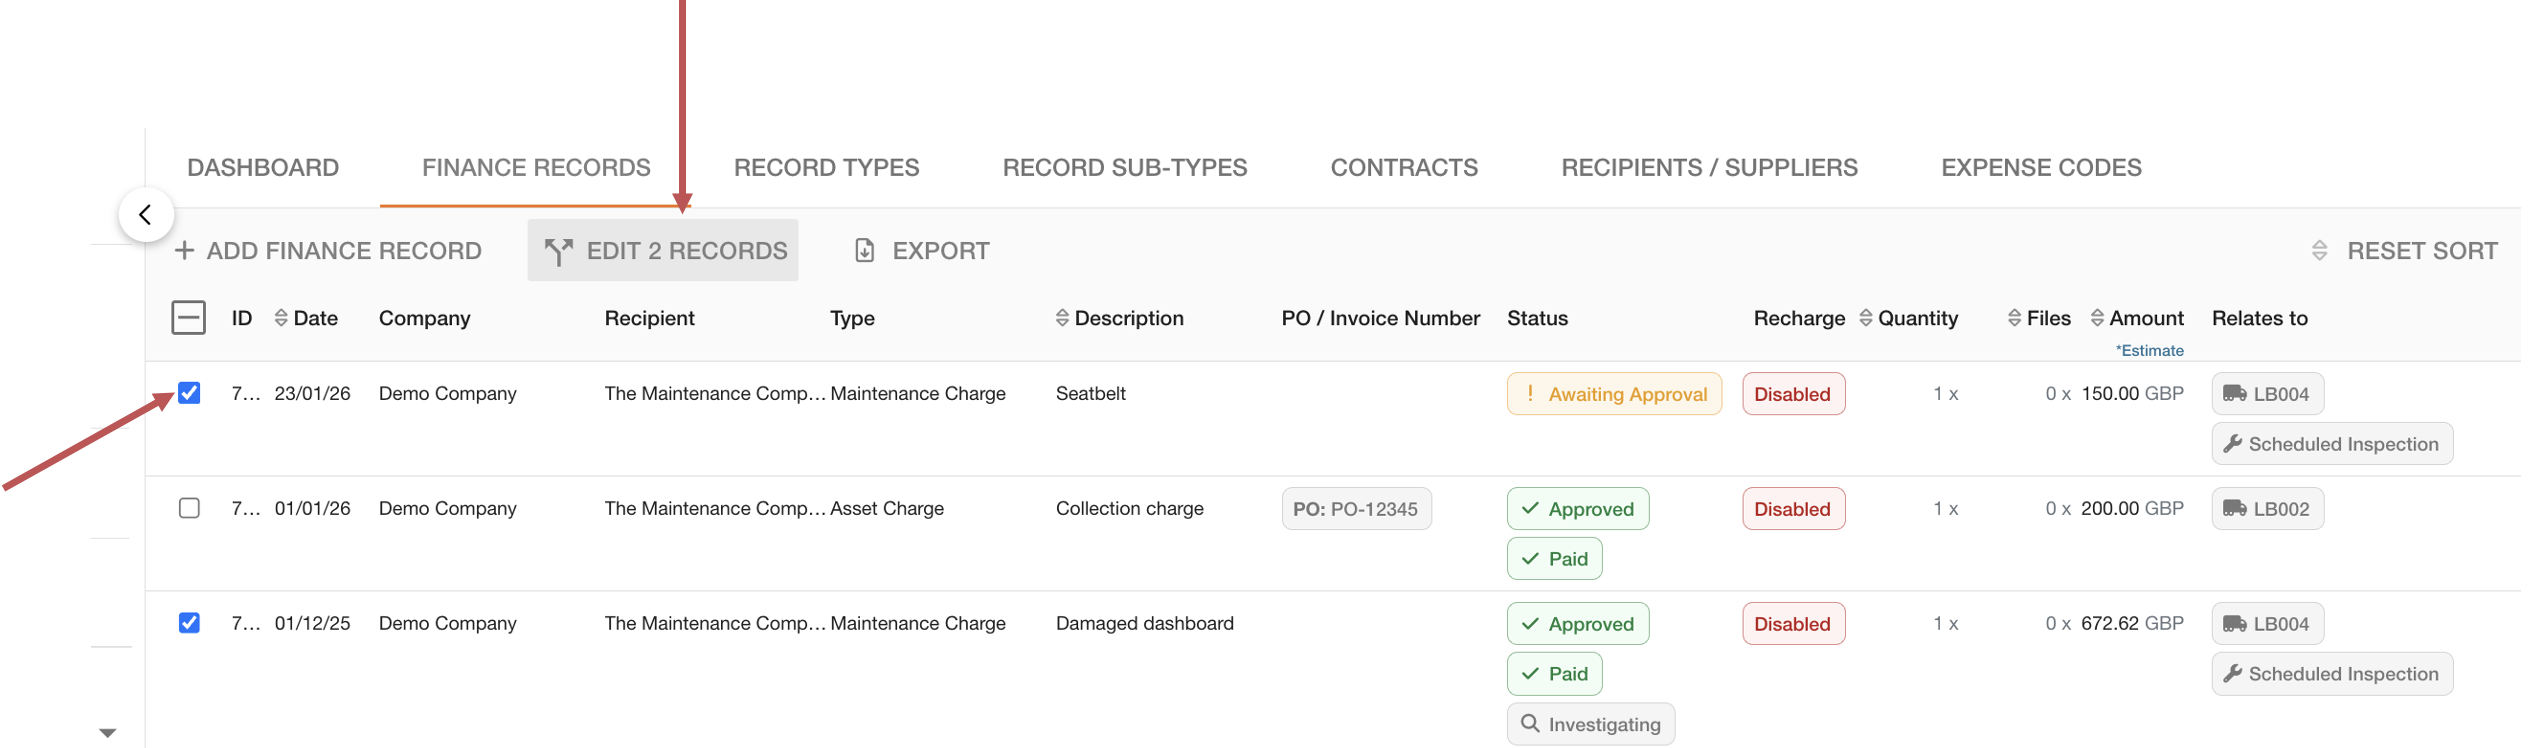
Editing Multiple Finance Records
You’re on the Manage Finance page.
You’re in the Finance Records tab.
The finance records have already been created.
-
Select the finance records you want to edit by checking the corresponding checkboxes alongside them.
-
Click the Edit Finance Records in the toolbar.
-
The editor will open.
-
-
Make your edits.
-
Click the Save All button in the editor.
-
A pop-up will open.
-
-
Click the OK button in the pop-up to confirm your edits.
The finance records have been edited.
If the field is marked as ‘no change,’ it indicates that each asset record has a different value for that field. Once you change the content of that field, it will be the same for every finance record.
Deleting Finance Records
You’re on the Manage Finance page.
You’re in the Finance Records tab.
The finance record has already been created.
-
Select the finance record you want to delete.
-
The editor will open.
-
-
Click the Delete button in the editor.
-
A pop-up will open,
-
-
Click the Confirm button in the pop-up.
The finance record has been deleted.