.png)
Access
Depending on your user permissions you may not have access to the Manage Users page.
You can add, edit and delete user accounts of your company’s employees.
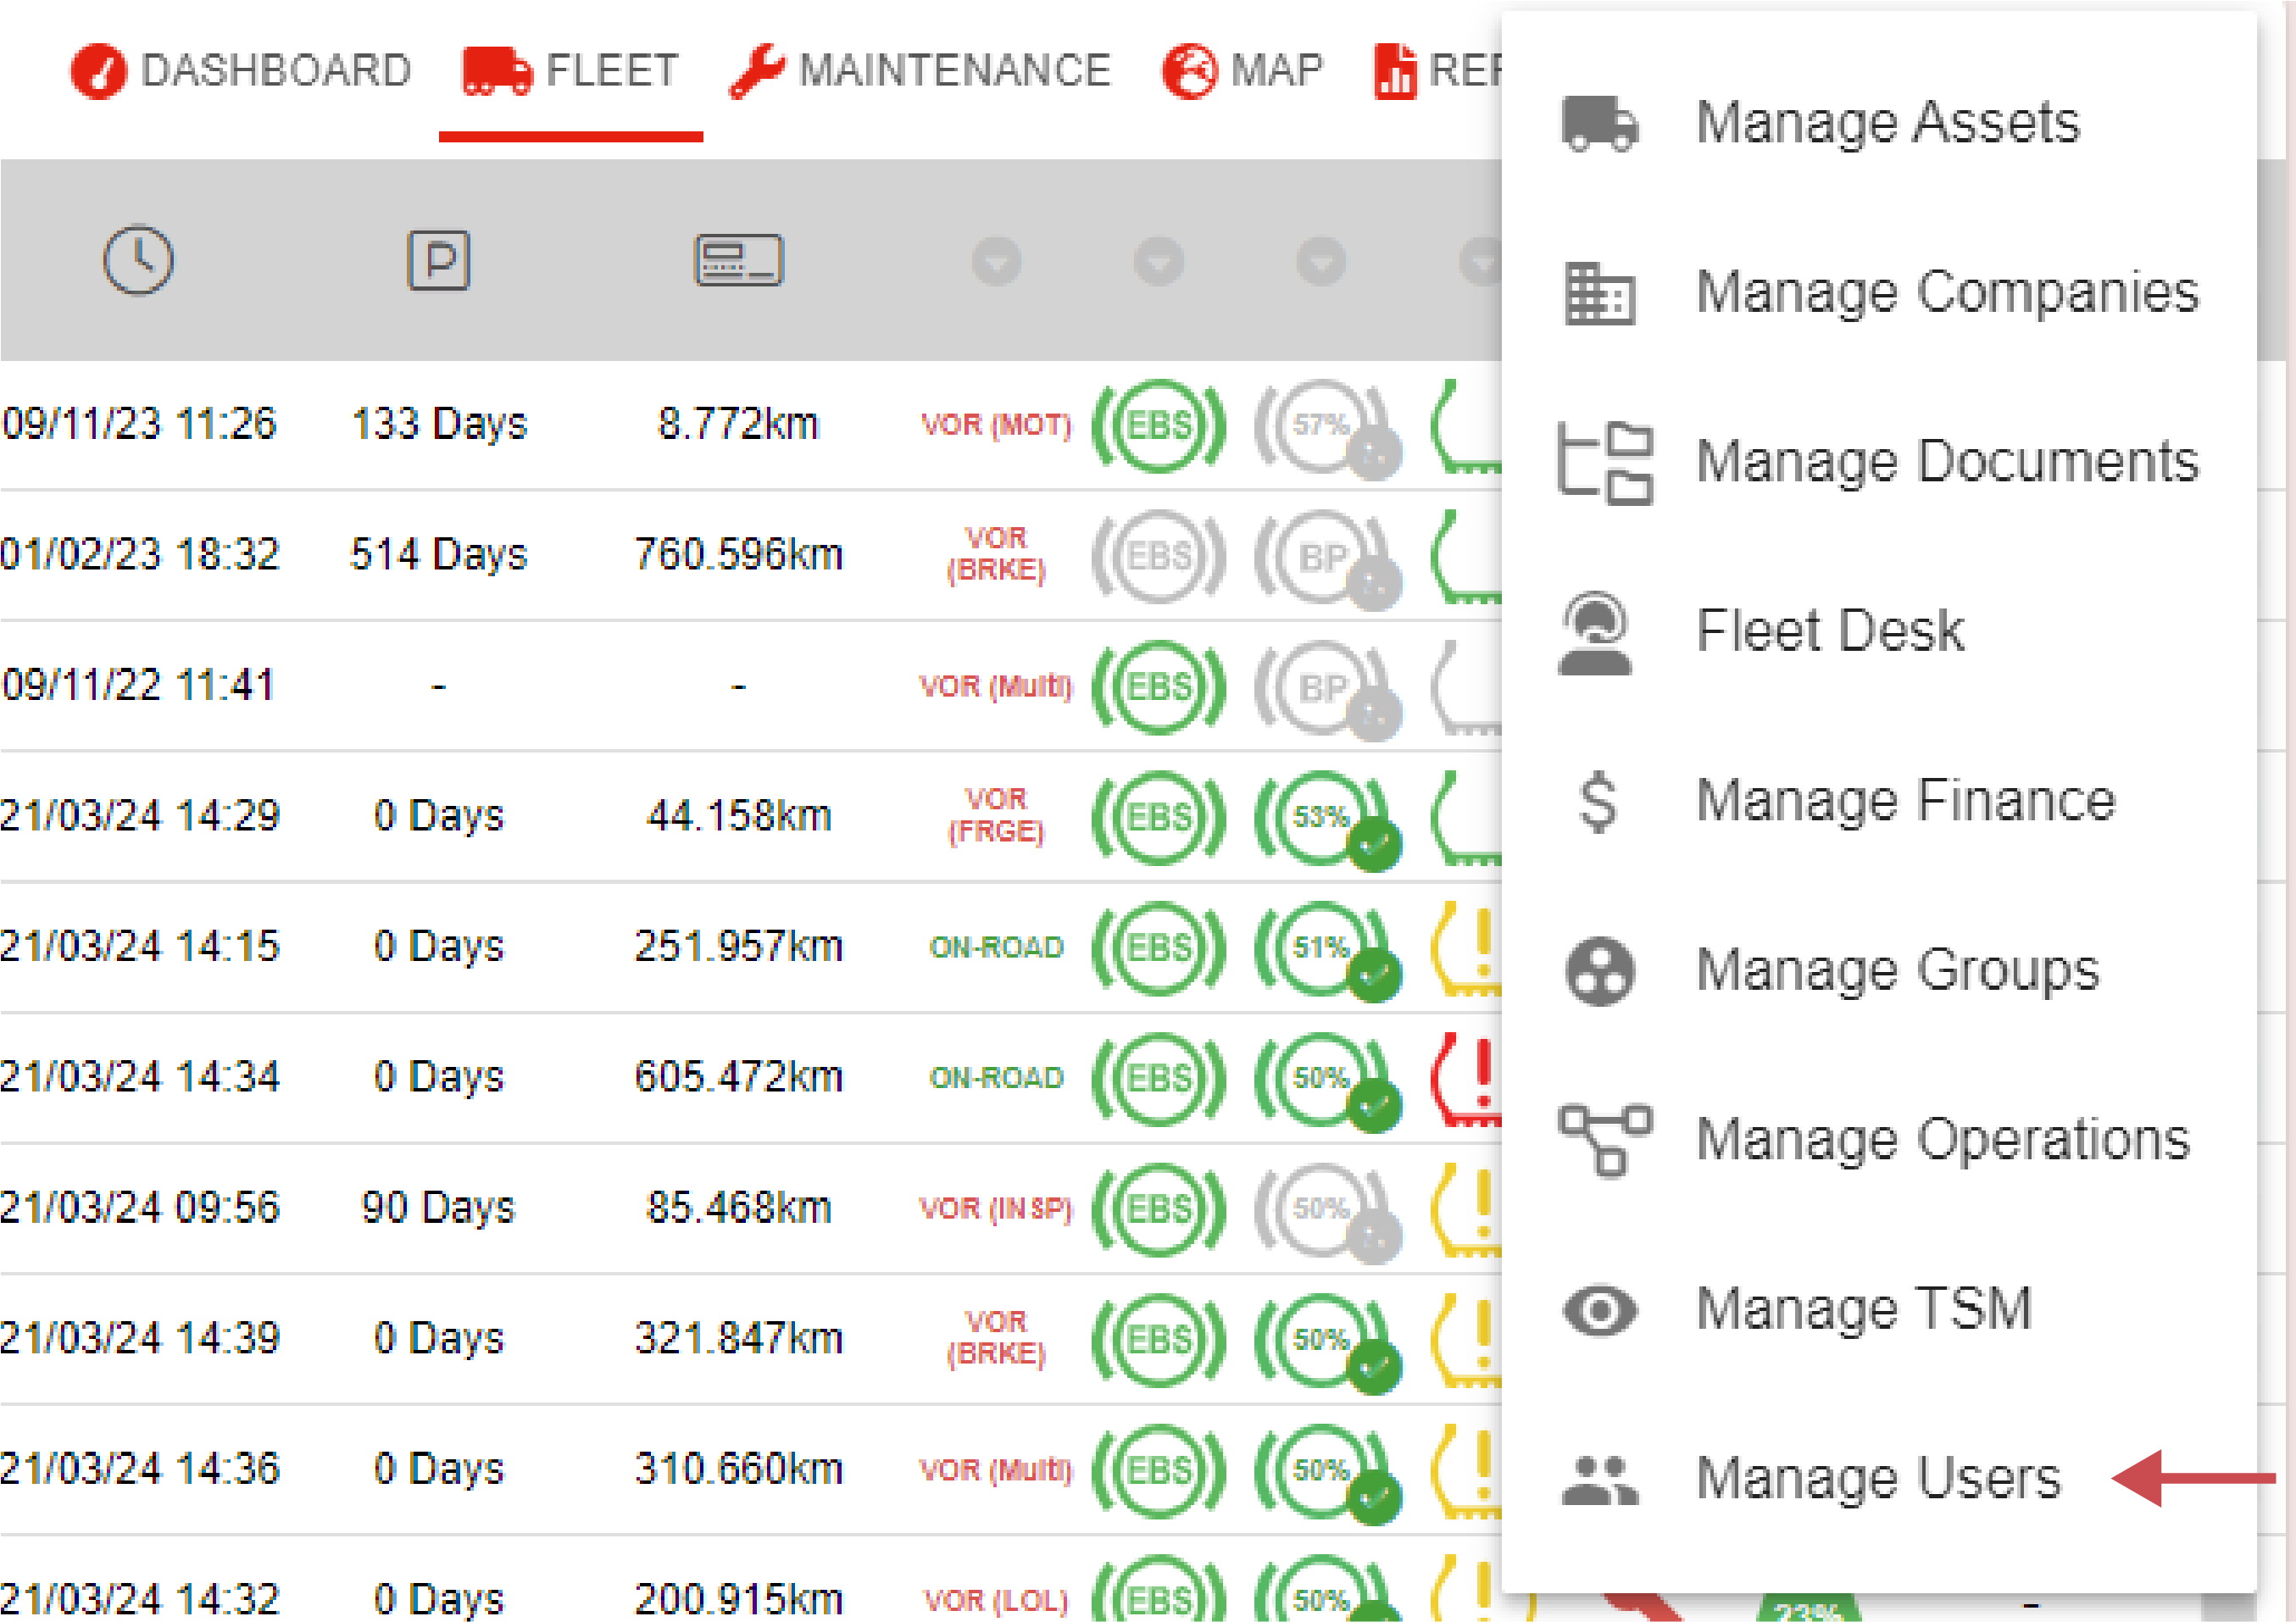
🧭 Getting to Manage Users
-
Click Admin in the navigation bar.
-
Click Manage Users in the drop down.
The Manage Users page will open.
📚 Manage Users Information
|
No. |
Description |
|---|---|

|
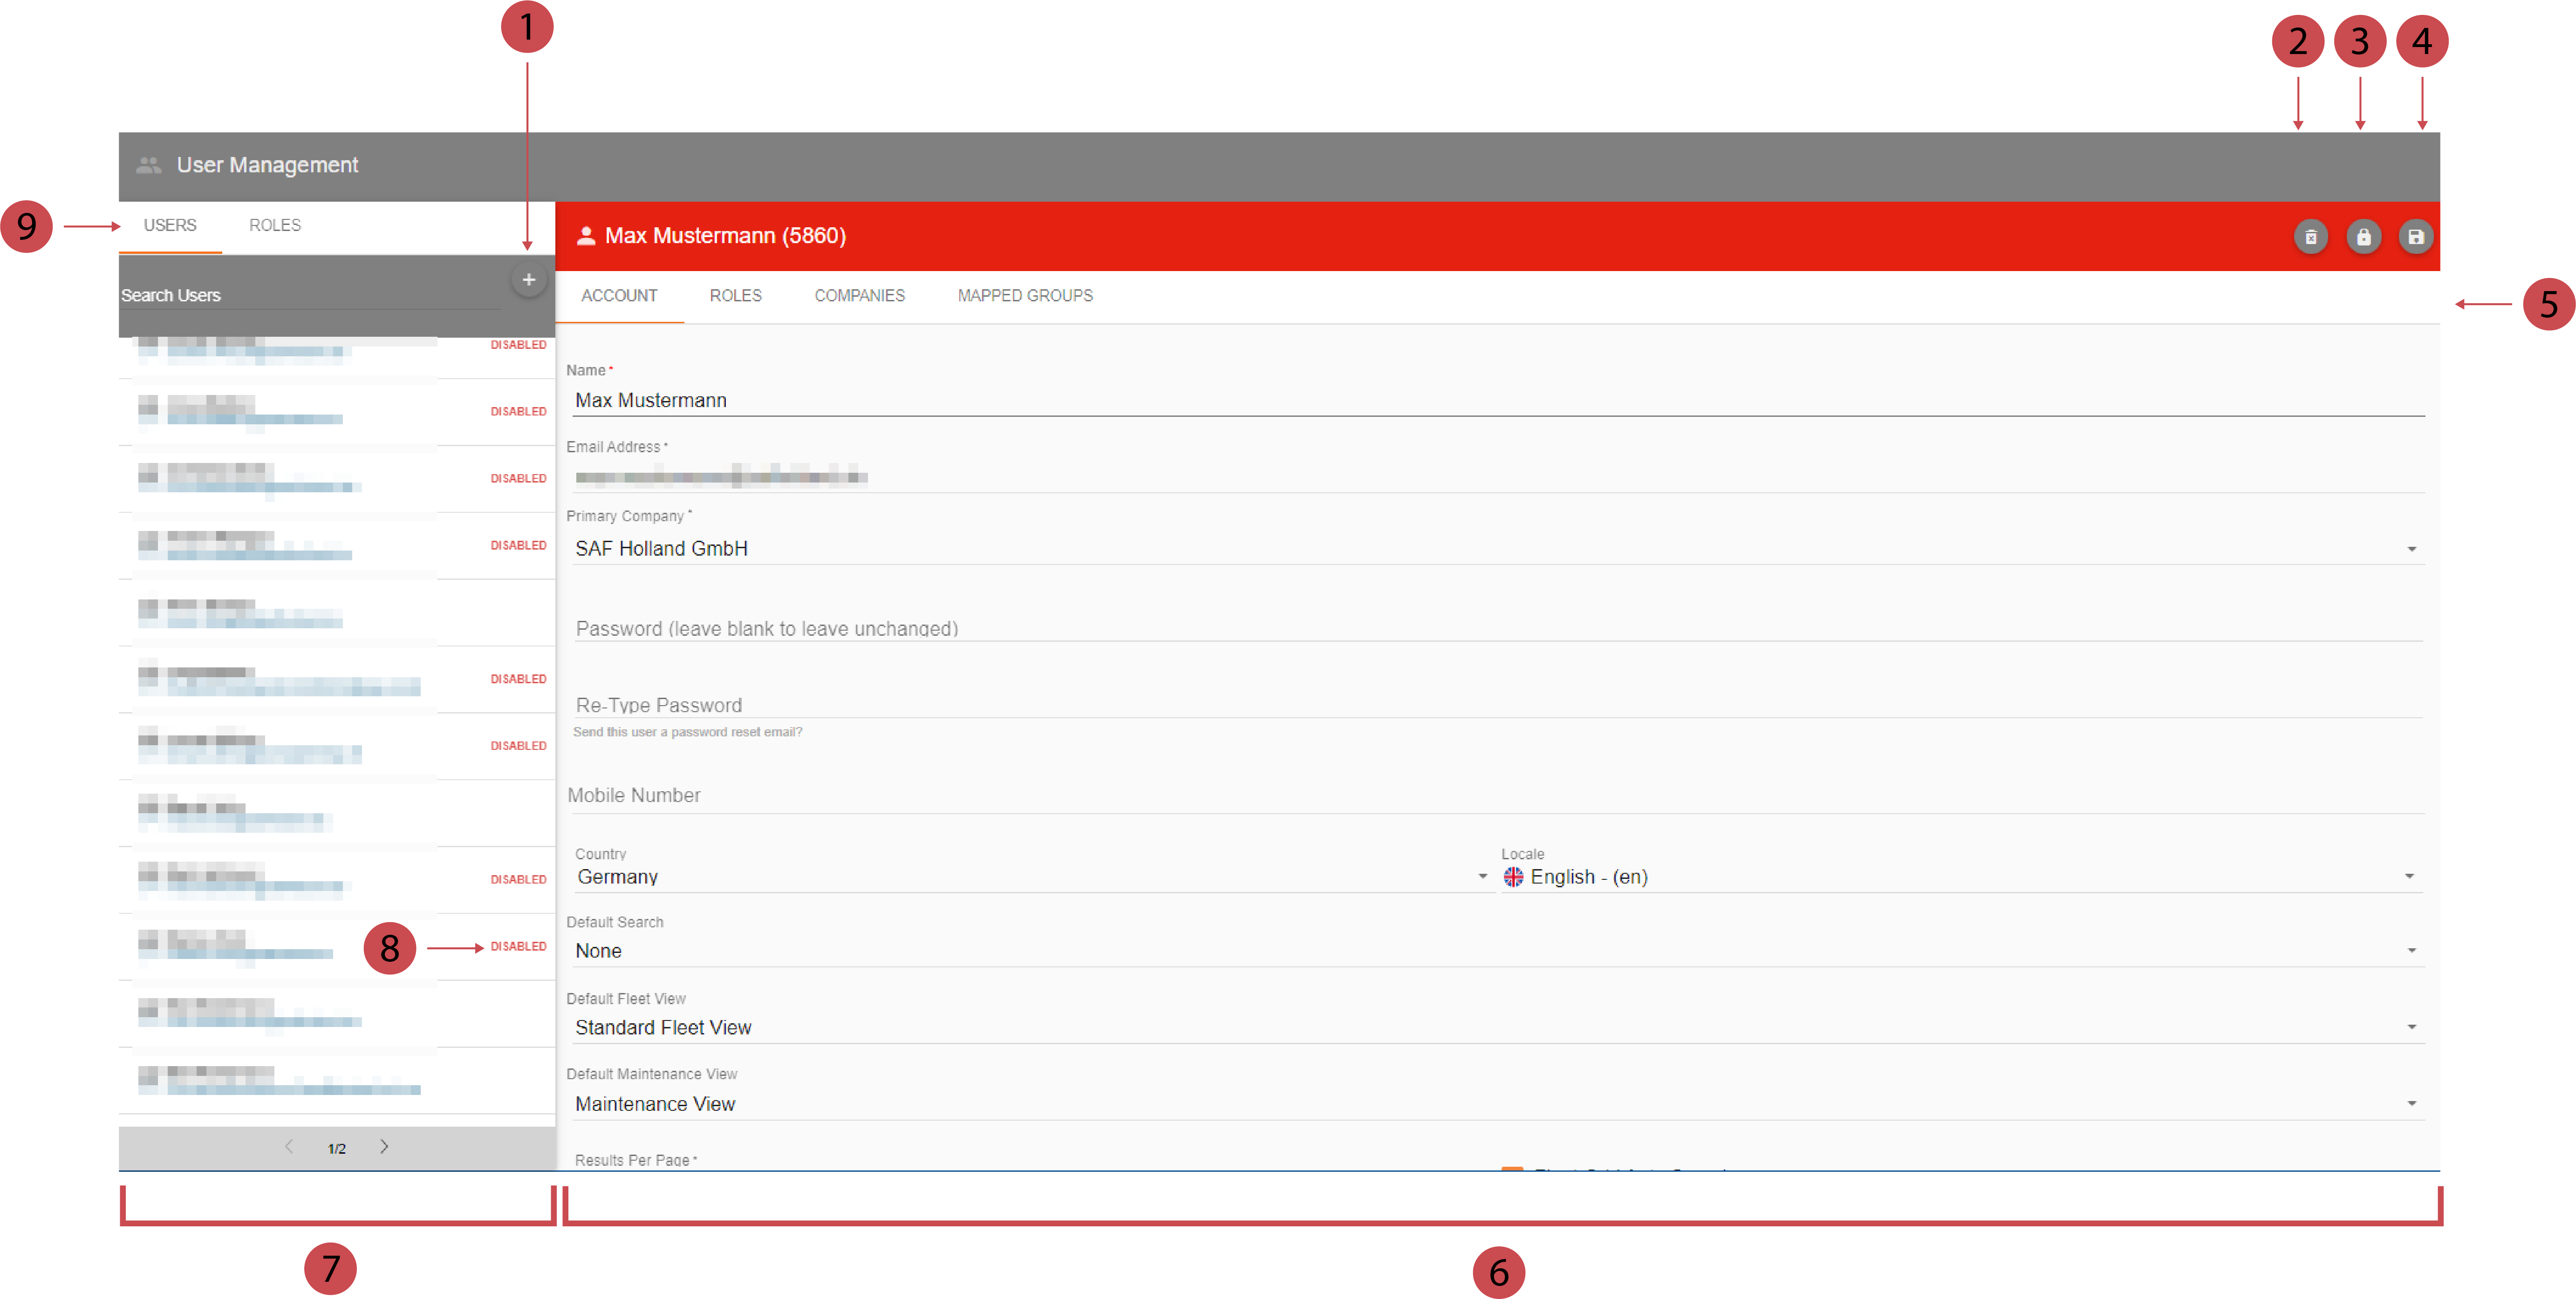
Adding Users you can add new users by clicking this button. |
|
Deleting User You can delete users by clicking this button once the user has been selected from the user list and the editor is opened. |

|
Disabling User You can disable users by clicking this button once the user has been selected from the user list and the editor is opened. |

|
Saving User You can save users by clicking this button once you’ve filled out all relevant fields in the editor. . |

|
Editor Tab-Bar Use the editor tab-bar to skip between the tabs of the editor. |

|
Editor You can add, edit, delete and disable users in the editor. |

|
User List The user list displays all users of your company. |

|
Disabled Once a user is disabled the account will be marked with the word. |

|
Tab-Bar Use the tab-bar to skip between the users and roles tab. |
Editor Overview
On the user editor, you will be able to edit the User’s Account information such as name, email address, primary company and mobile number.
You can also use the tab bar to click into different customisable categories on the user’s account, such as:
-
Account
-
Roles
-
Companies
-
Mapped Groups
Account
On the Account tab, the user’s default view of the Maintenance Grid and the Fleet Grid can be customised by clicking into the fields and changing the dropdown option.
Roles
Roles are ‘bundles’ of policies.
On the Roles tab, the roles which are ticked are currently mapped to the User. You can tick or untick the checkboxes alongside each role to assign or unassign it. To see the policies bundled into each role you can click on the Role to expand more detail.
Companies
The companies a user is mapped to can be managed via the ‘Company’ tab. The ‘Primary’ company the user is mapped to will be listed as ‘Primary’ in the place of a checkbox. You can tick or untick the companies relevant to the new user to add as Secondary Companies. In many cases, only the Primary company will be needed.
Ticking the checkbox will allow the selected user to be mapped to groups of that company, and view assets belonging to that company. Depending on the user’s policies they may also be able to see the company’s users, documents, schedules and groups.
Mapped Groups
Groups can be used to compartmentalise a large Company into smaller, more manageable groups. These might mirror departments, depots or different locations.
If a user is not mapped to any groups a warning message will appear in the Account tab. Clicking the FIX NOW button will map the user to the top-level group of their Primary Company, which means all groups within that company will be inherited.
To map the user to specific groups within their primary company do not use the ‘FIX NOW’ button.
Similarly to companies, in the 'Mapped Groups' tab, the user can be mapped to specific groups in their Primary or non-primary (secondary companies they are mapped to via the ‘Companies’ tab) companies by using the checkboxes on each row.
If the user is mapped to the upper-level company or group they will inherit all groups within - shown with the ‘INHERITED' label on the rows.