.png)
https://developer.okta.com/docs/guides/oin-sso-overview/
Requirements
-
An Okta user account with access to the Admin Console.
-
Users already set up
-
Alternatively, create users and manage users via https://help.okta.com/oie/en-us/content/topics/users-groups-profiles/usgp-main.htm
-
-
An Axscend Portal Account with an Administrator Role
Stages
You will need to do the following to set up SSO with Okta.
-
Obtain your Integration ID (See Configure Single Sign On (SSO) )
-
Create App Integration
-
Configure SAML Settings
-
Finalising Your Application
-
Provide your Metadata URL or Metadata XML (See Configure Single Sign On (SSO) )
Create App Integration
-
Sign onto Okta
-
Click Admin in the navbar
-
You may be prompted to authenticate with your password or 2FA.
-
-
In the sidebar click Applications > Applications
-
Click Create App Integration
-
Select SAML 2.0
You should now be able to fill in the General settings

-
Enter Axscend as the App Name
-
Optionally, add Axscend Logo
-
Click Next
Configure SAML Settings
You will need your Portal Integration ID.
You have Created App Integration.
You have completed Page 1 - General Settings.

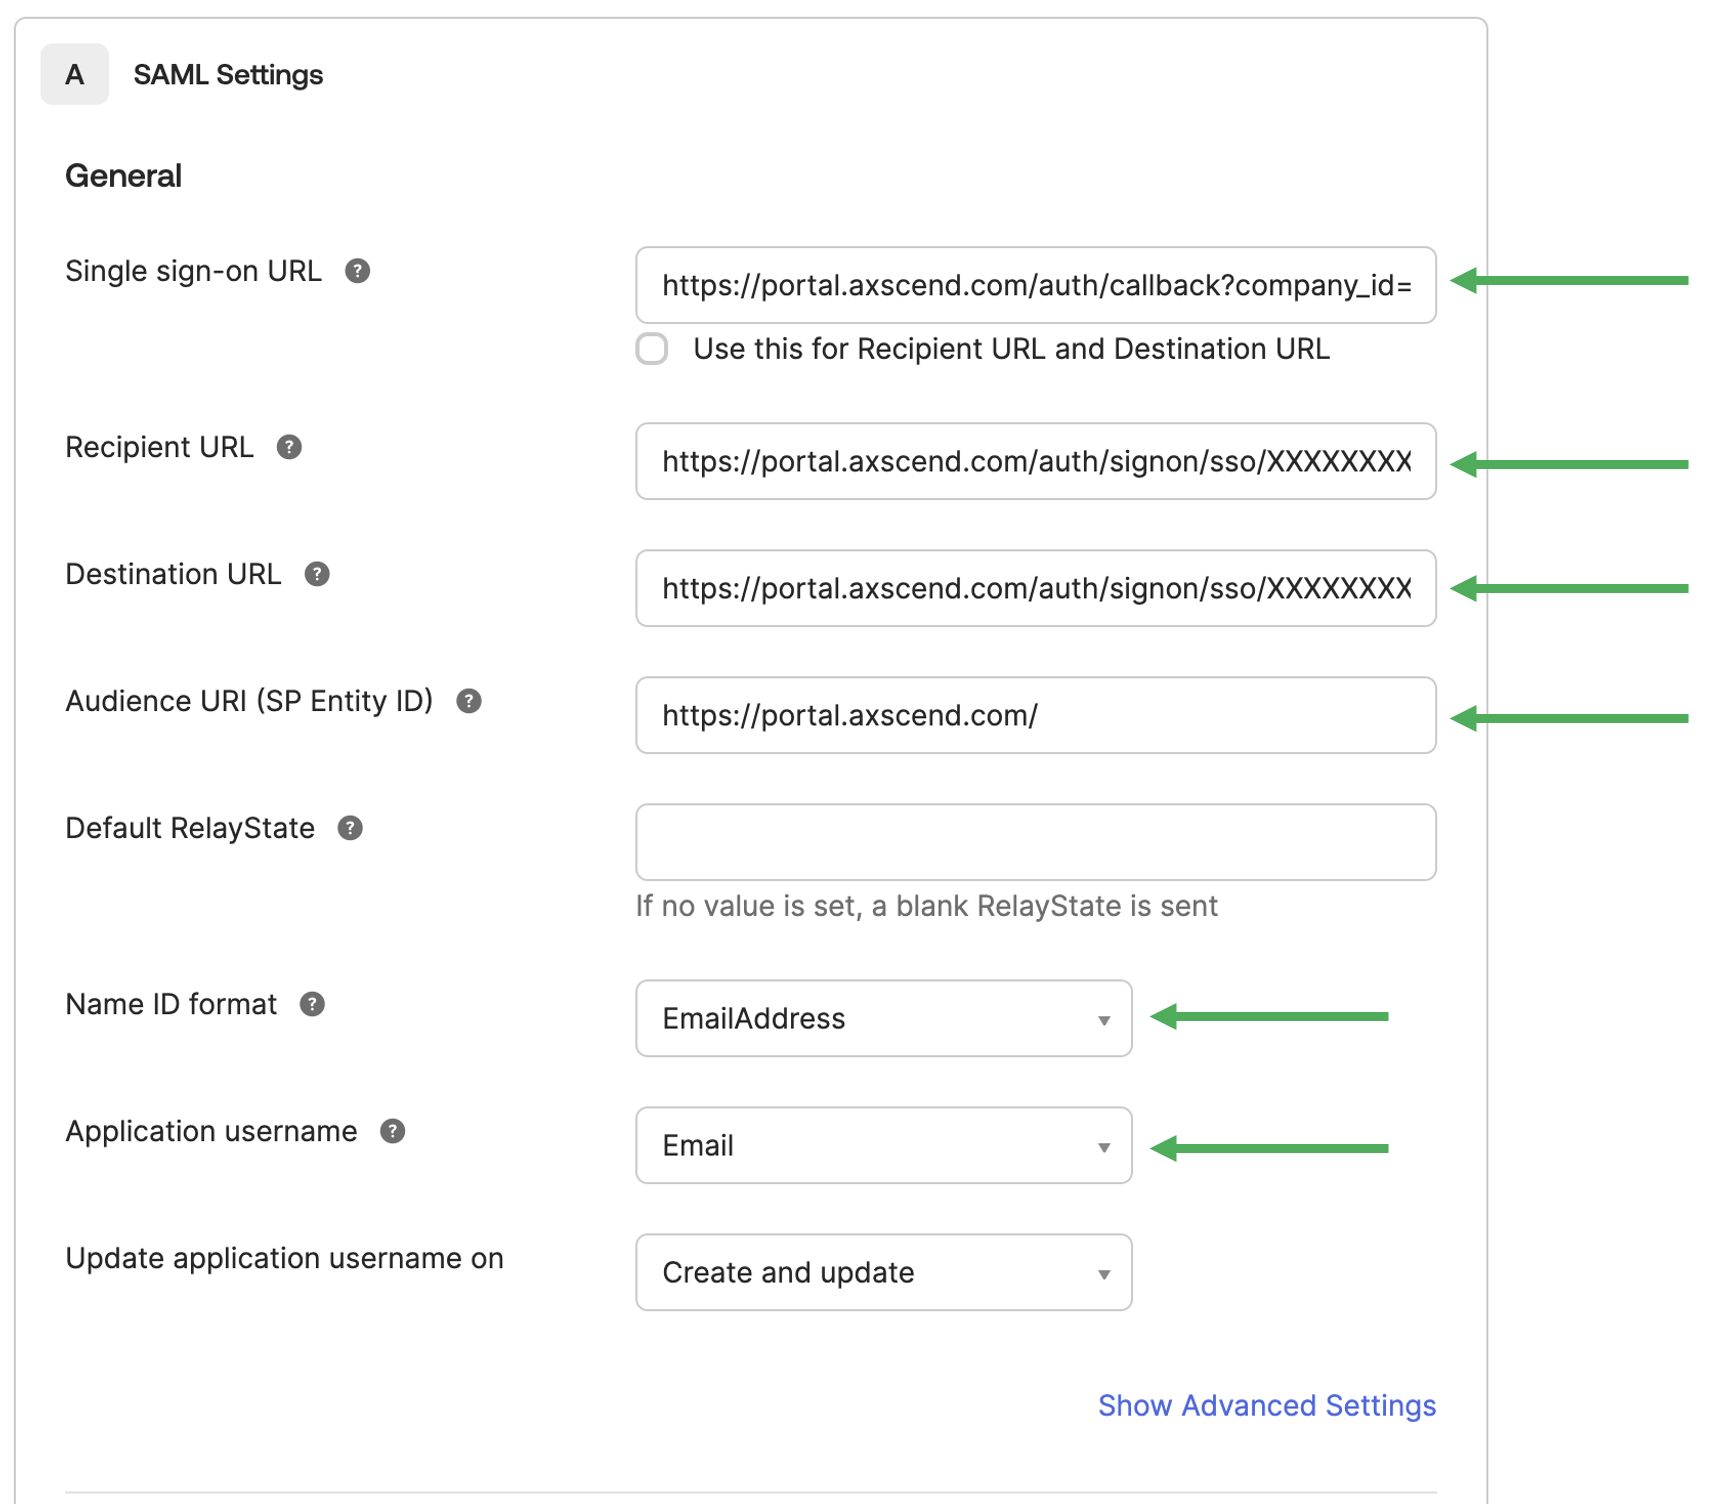
You will then need to configure the Basic SAML Details.
-
Add the following details to SAML Settings:
-
Single sign-on URL: https://portal.axscend.com/auth/callback?company_id=XX
-
Replace company_id=XX with your unique company_id
-
Untick ‘Use this for Recipient URL and Destination URL’
-
-
Recipient URL: https://portal.axscend.com/auth/signon/sso/<Integration ID>
-
Replace <Integration ID> with your unique Integration ID
-
You can get your Integration ID from Configure Single Sign On (SSO)
-
-
Destination URL: https://portal.axscend.com/auth/signon/sso/<Integration ID>
-
This will be the same URL as the Recipient URL.
-
-
Audience URI (SP Entity ID): https://portal.axscend.com/
-
Name ID format: EmailAddress
-
Application Username: Email
-
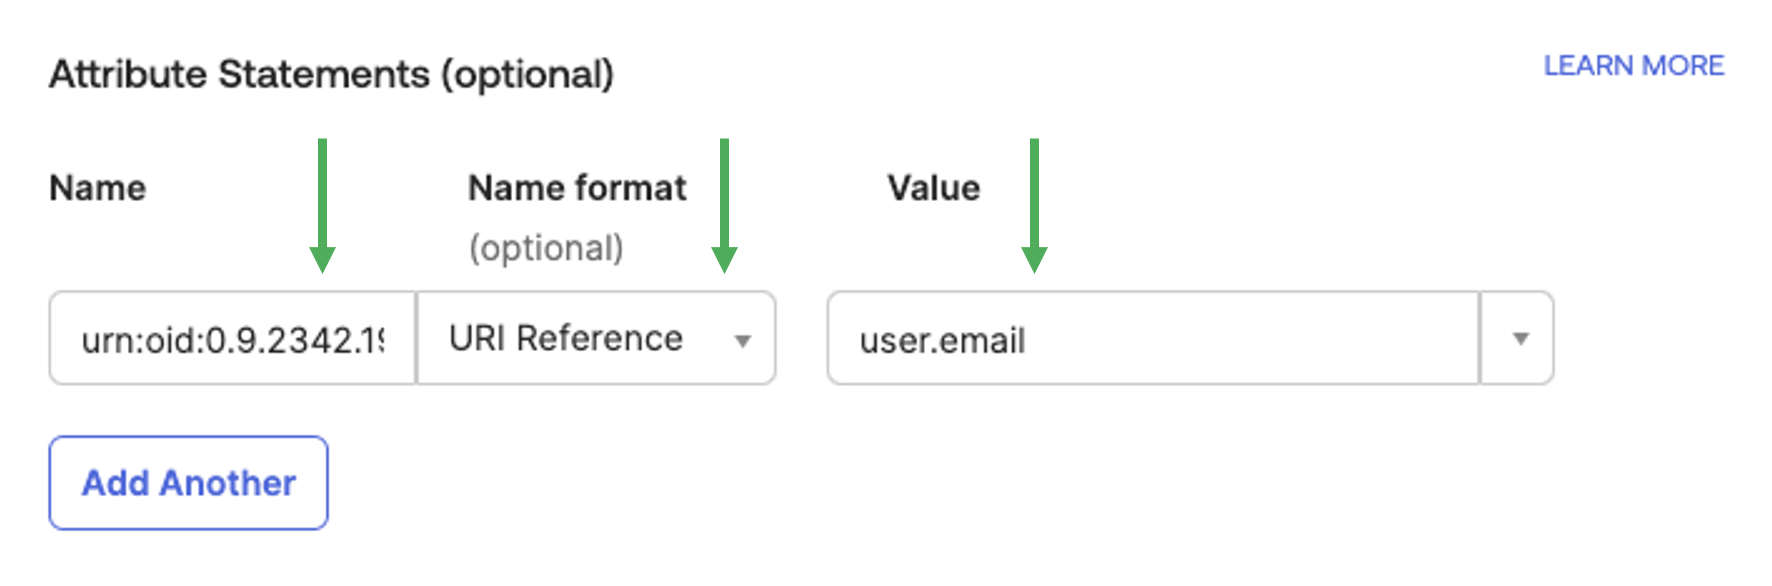
Continue to Attribute Statements
-
Add the following:
-
Name: urn:oid:0.9.2342.19200300.100.1.3
-
This is the URI Reference for email address
-
-
Name Format: URI Reference
-
Value: user.email
-
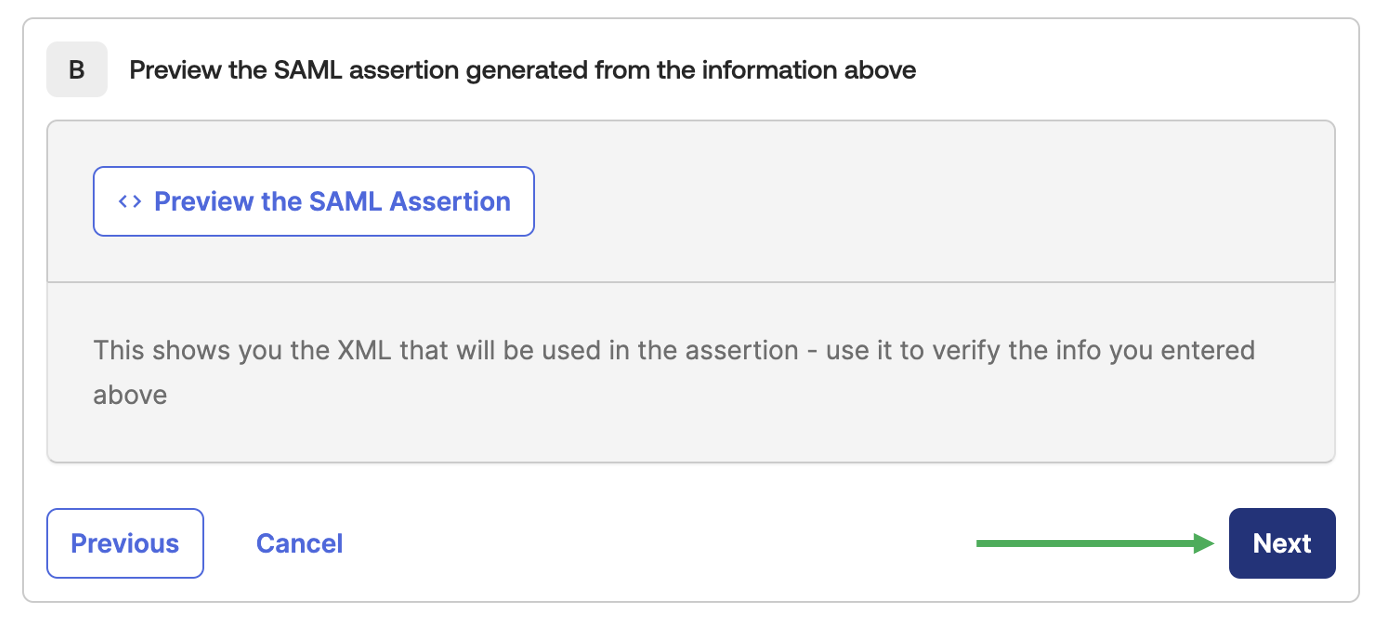
Continue to Section B
-
Click Next
Feedback

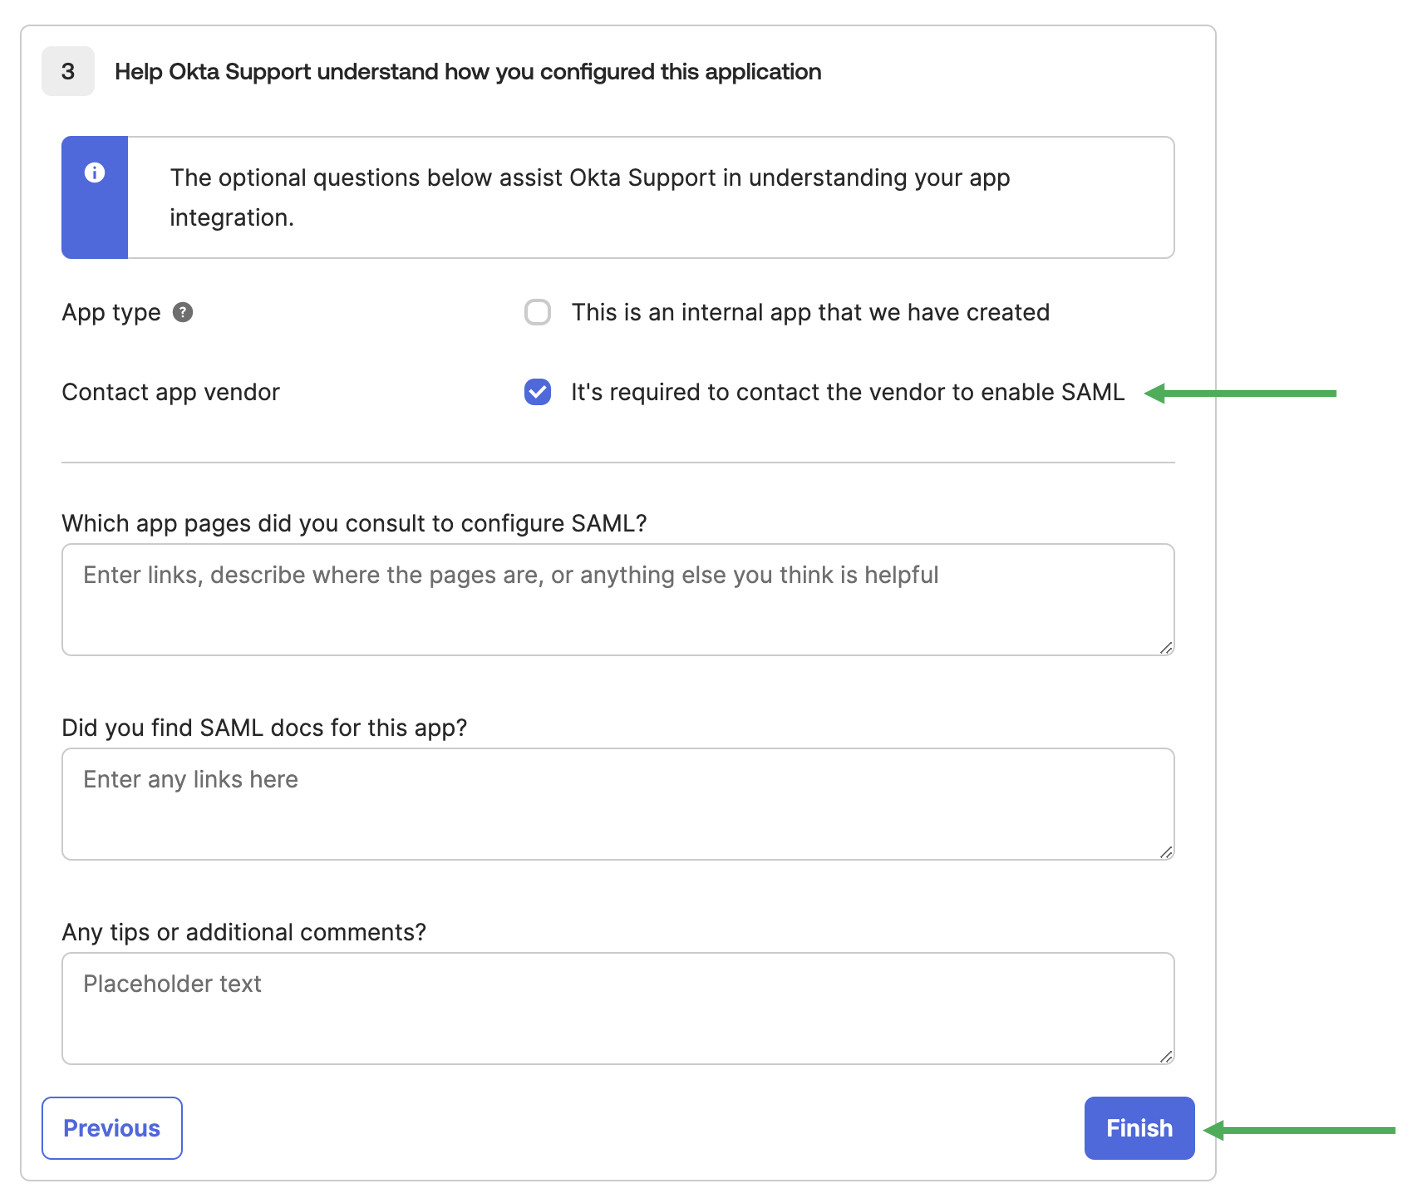
You will then be on the Page 3 - Feedback.
-
Ensure you have selected Contact app vendor
-
This informs Okta that the app you’re interacting with is external, and not part of your organisation.
-
-
Click Finish
Finalising Your Application
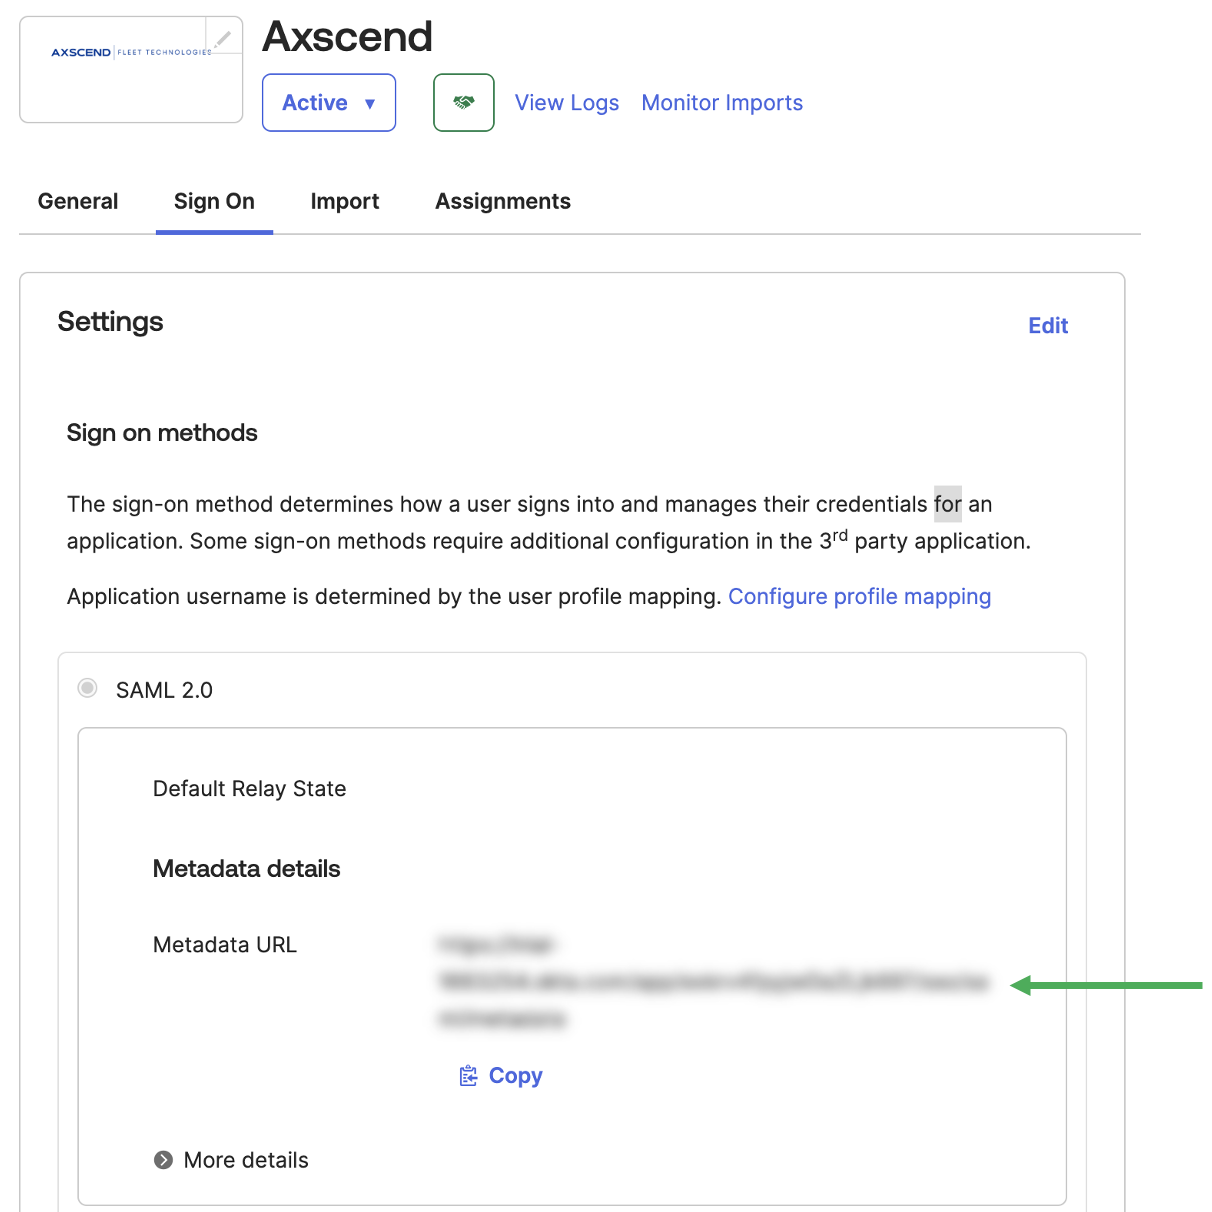
Immediately after saving, you should be redirected to the Sign On tab of the application you have created. This will show the Metadata URL.
Now the application is set, you need to ensure users or groups are able to authenticate through this application.
-
Click the Assignments Tab to configure which users should be included.

You can now use your Metadata URL to Configure Single Sign On (SSO) on the Portal.