.png)
You can only add assets to a group via the Manage Asset page or the Asset Cart. You can’t add assets to a group on the Manage Groups page.
When changing the group assigned to assets, you may want to either:
Change the group of an individual asset
This can be done either via the Manage Assets page or the Asset View.
Asset View
You’re on the Asset View page for the relevant asset.
-
Scroll and locate Settings in the sidebar
-
Click Settings
-
The Editor will open.
-
-
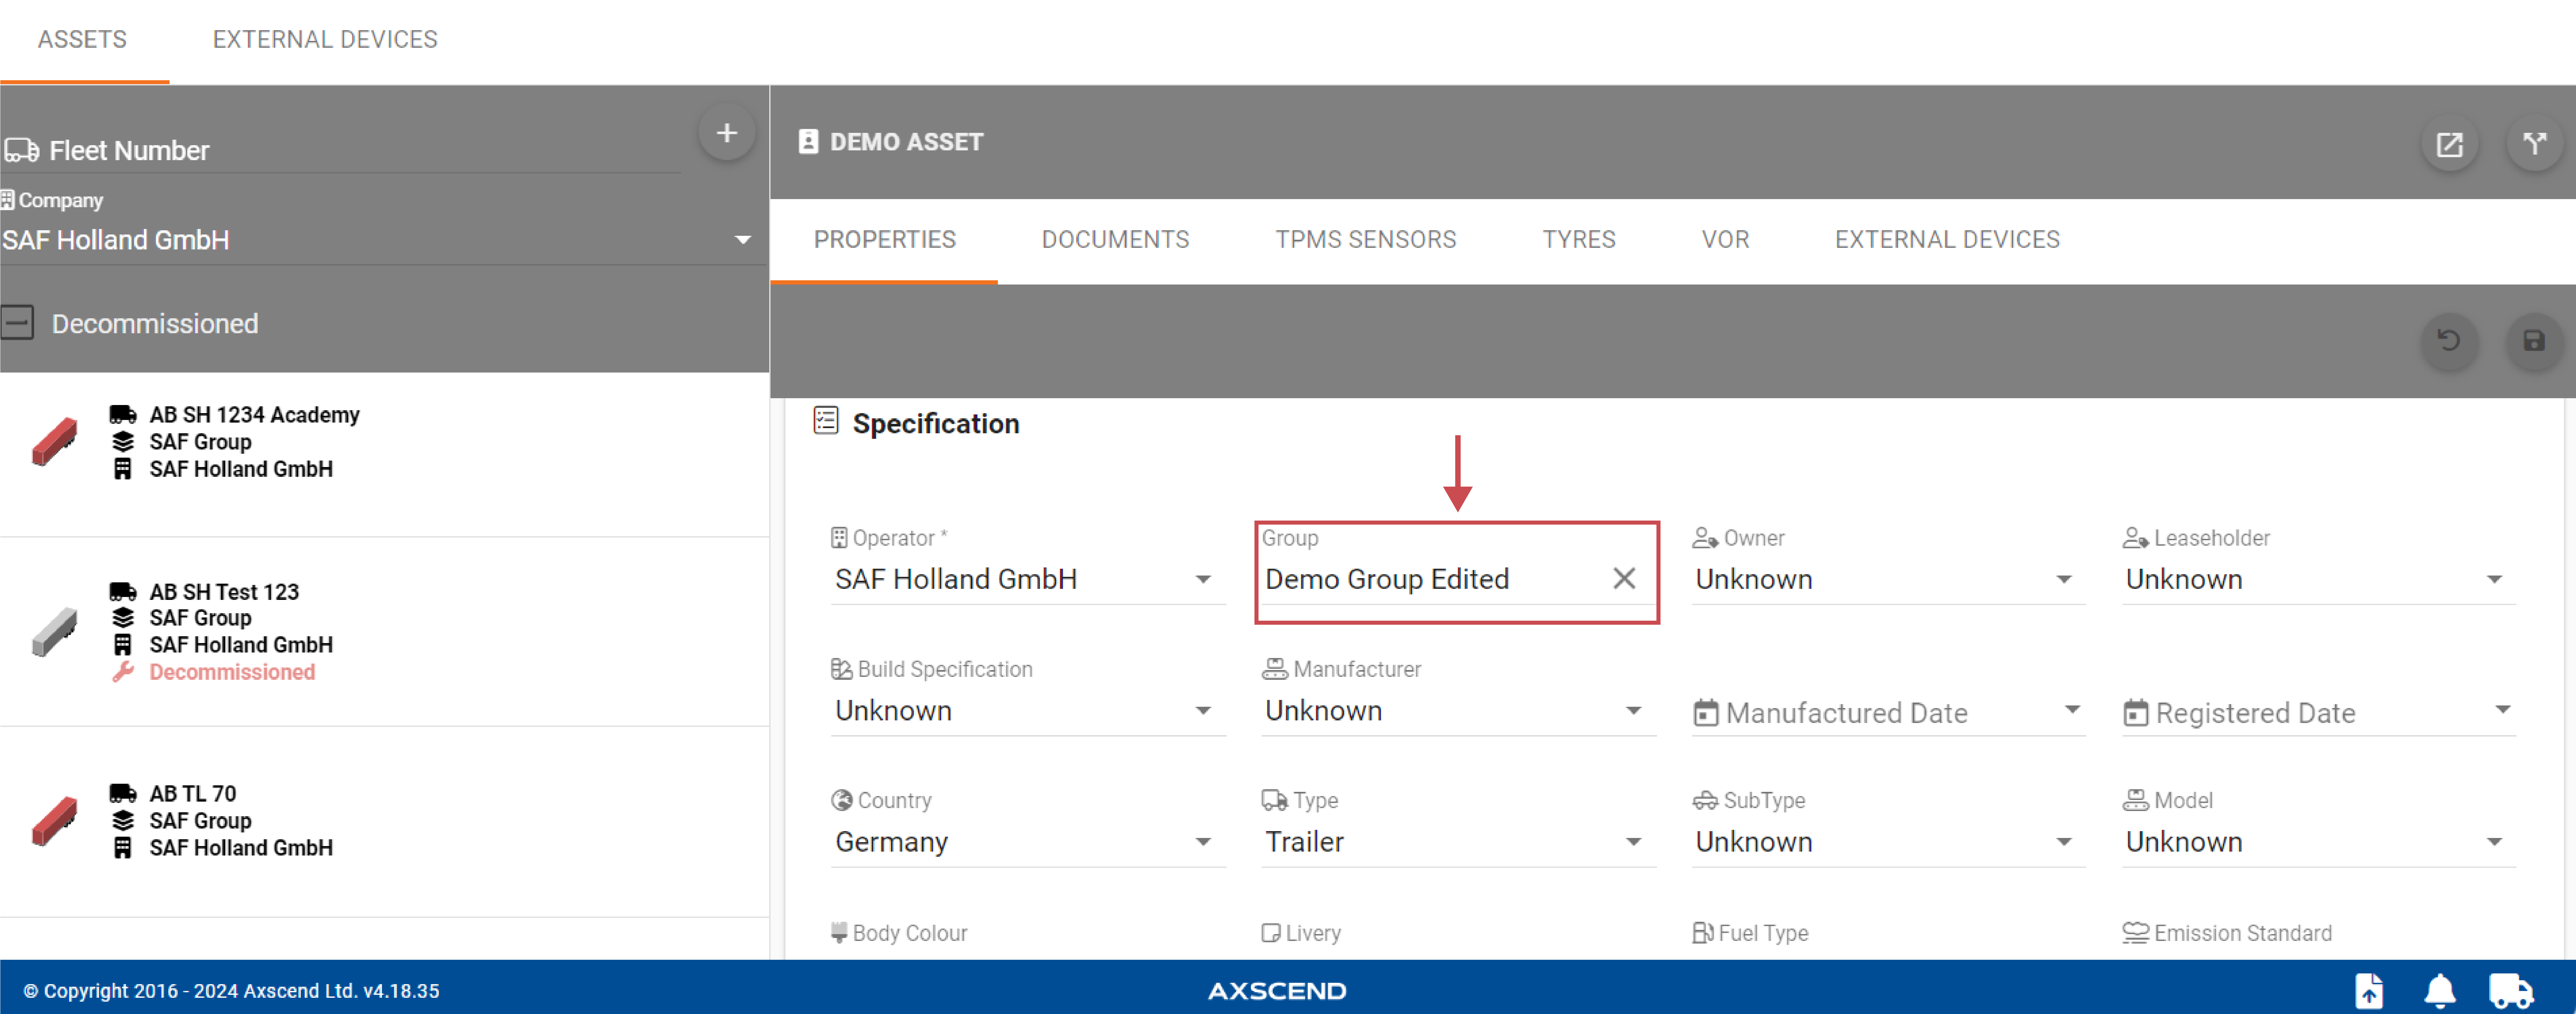
Click in the Group field in the Specification section.
-
You can use the
button to clear the current group
-
Start typing in the box to search for the relevant group
-
-
Select the new group.
-
The Save button will become active.
-
-
Click Save.
The asset’s group has been changed.
Manage Assets
You’re on the Manage Assets page.
-
Find the asset you want to change the group of in the list.
-
Click on the asset.
-
The Editor will open.
-
-
Click in the Group field in the Specification section.
-
You can use the
-
Start typing in the box to search for the relevant group
-
-
Select the new group.
-
The Save button will become active.
-
-
Click Save.
The asset’s group has been changed.
You can’t see groups
If you do not see the group you wanted in the dropdown list, you do not have permission (i.e. you are not ‘mapped’ to that group).
Your line manager can give you access to additional groups in your company.
Change the group of multiple assets
Go to the Asset Cart page to see how to get here.
You’ve already created an Asset Cart.
You’re in the Asset Cart menu.
-
Click Edit Assets.
-
The editor will open.
-
-
Click in the Group field in the Specification section.
-
Select the new group.
-
The Save button will become active.
-
-
Click Save.
The assets' group has been changed.
The Group field will have '(mixed)' alongside the label if the in-cart assets have more than one different group assigned to them. (i.e., not a common group amongst all assets). Otherwise, if all assets are assigned to the same group, the group name will be shown.
You can’t see groups
If you do not see the group you wanted in the dropdown list, you do not have permission (i.e. you are not ‘mapped’ to that group).
Your line manager can give you access to additional groups in your company.